Battle of Fromelles Part 4
The Nightmare

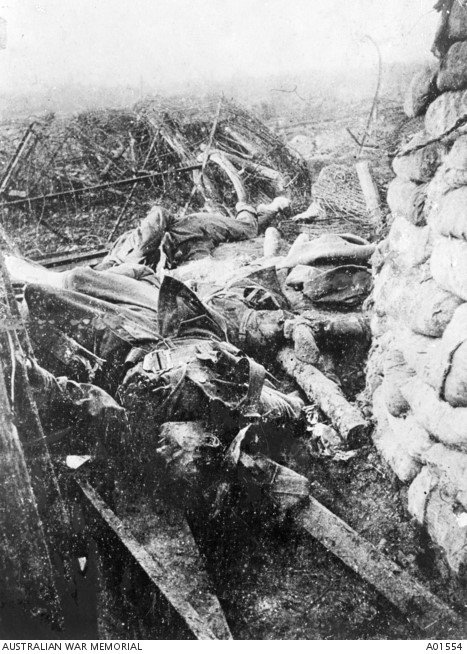
Equipment of an Australian soldier killed at Fromelles.
With the 15th Brigade all be annihilated, the 14th and 8th Brigades tried desperately to hold onto their gains. But with their right flank open and the left under intense counter attack, the scattered parties were in a desperate situation. Spirited defensive counter attacks held the Germans at bay for a while, but diminishing supplies and the strength of German attacks snuffed out the pockets one by one. And then, when the Germans reoccupied their own trenches behind the Australians, cutting them off from their own front lines, things started to fall apart.


patreon.com/user?u=46029761


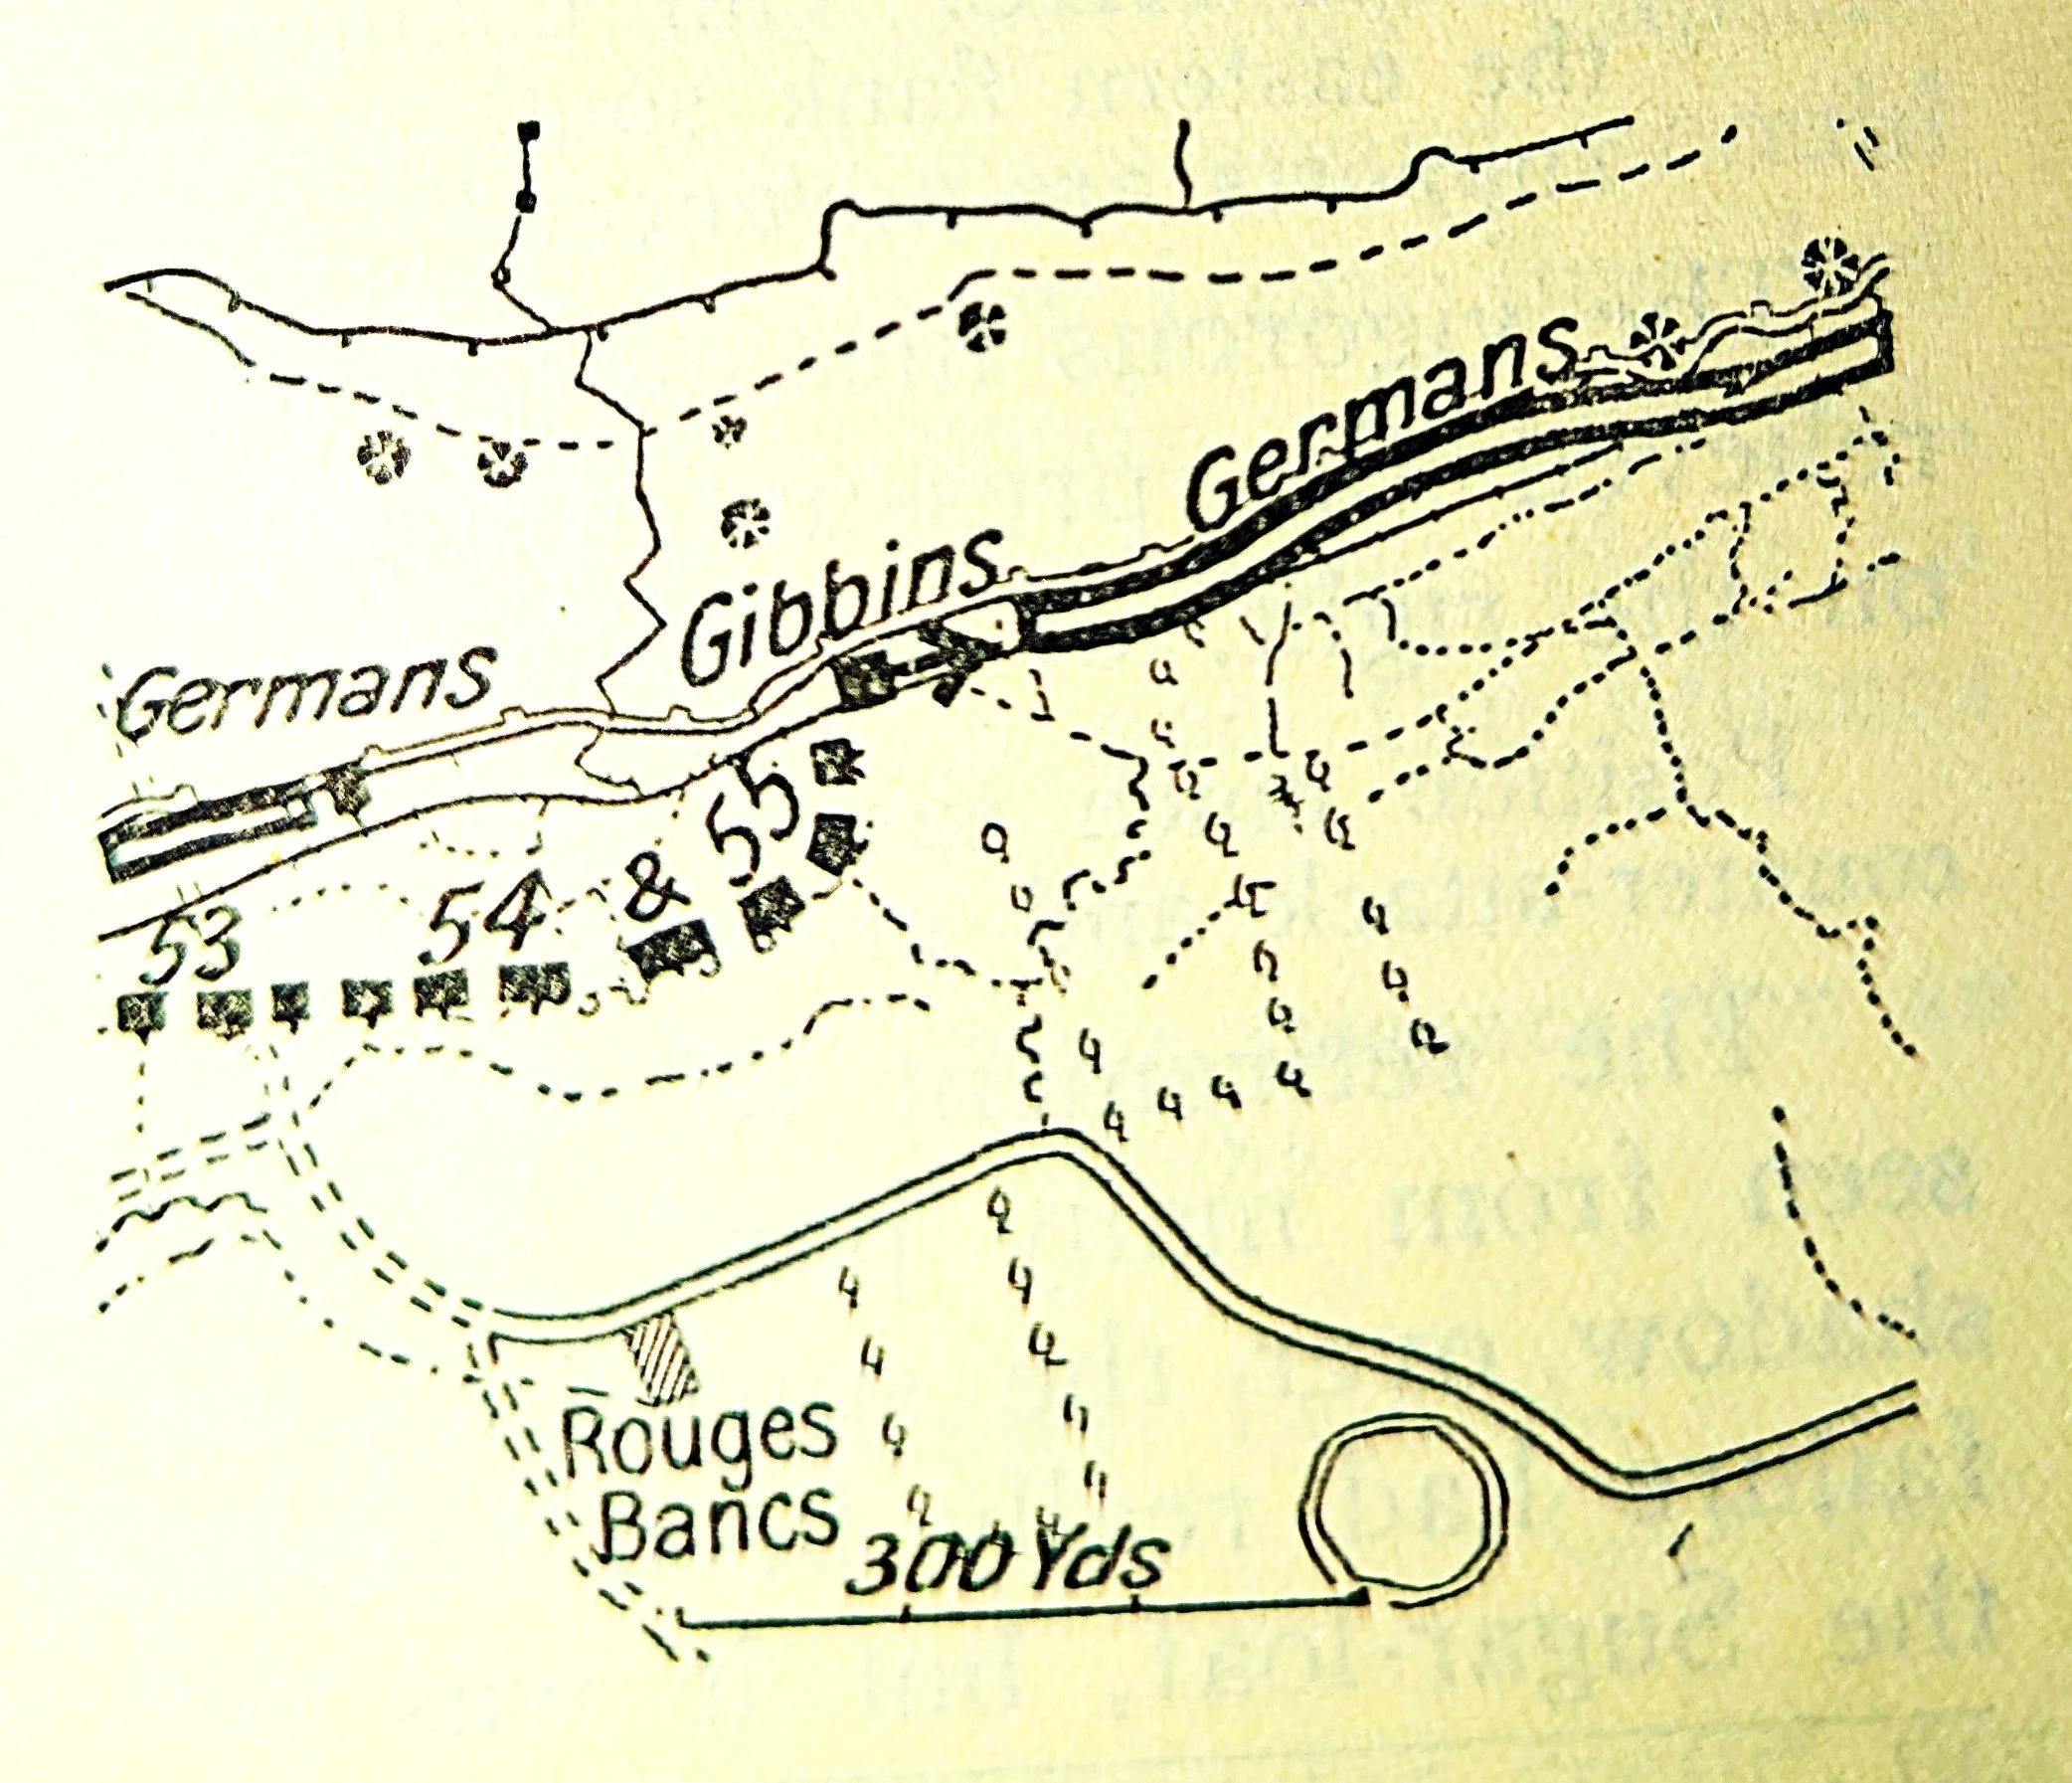


A series of diagrams showing the German advances and the eventual Australian withdrawal.